![]() |
| PowerBook G4 running TinyStories 110M Llama2 LLM inference |
Monday, March 24, 2025
Thinking Different, Thinking Slowly: LLMs on a PowerPC Mac
Friday, September 23, 2022
12V: Ryobi 40V Lithium Battery Charger
I have been impressed with Ryobi's 40V battery packs lately. They are fairly energy dense and compatible with a wicked 1800W inverter/power station that I have. Internally they are a 10S lithium pack with some number of cells in parallel depending on the pack capacity. They use the safer flame proof cells and have a sophisticated BMS built-in so I feel pretty comfortable messing with them. They can also be obtained at steep discounts if you are willing to tolerate used packs from eBay. In my experience, they test out fine.
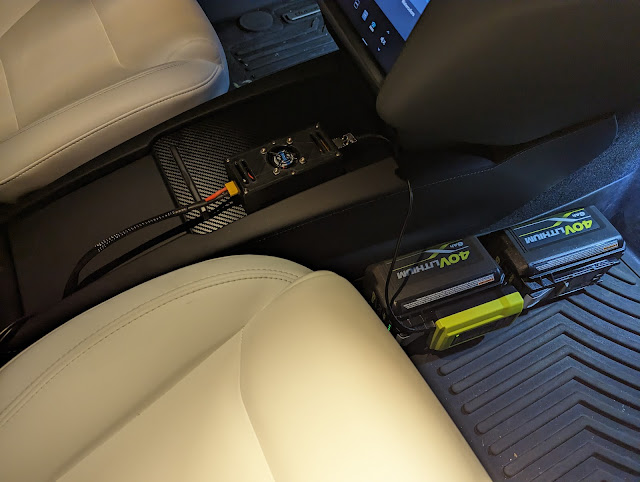
I came to the realization that it would be handy to be able to charge these batteries in the car. I drive electric vehicles and in the event of a power failure, these packs could easily be charged up numerous times. Ryobi doesn't make a 12V-compatible charger for this line of batteries so I took matters into my own hands.
![]() |
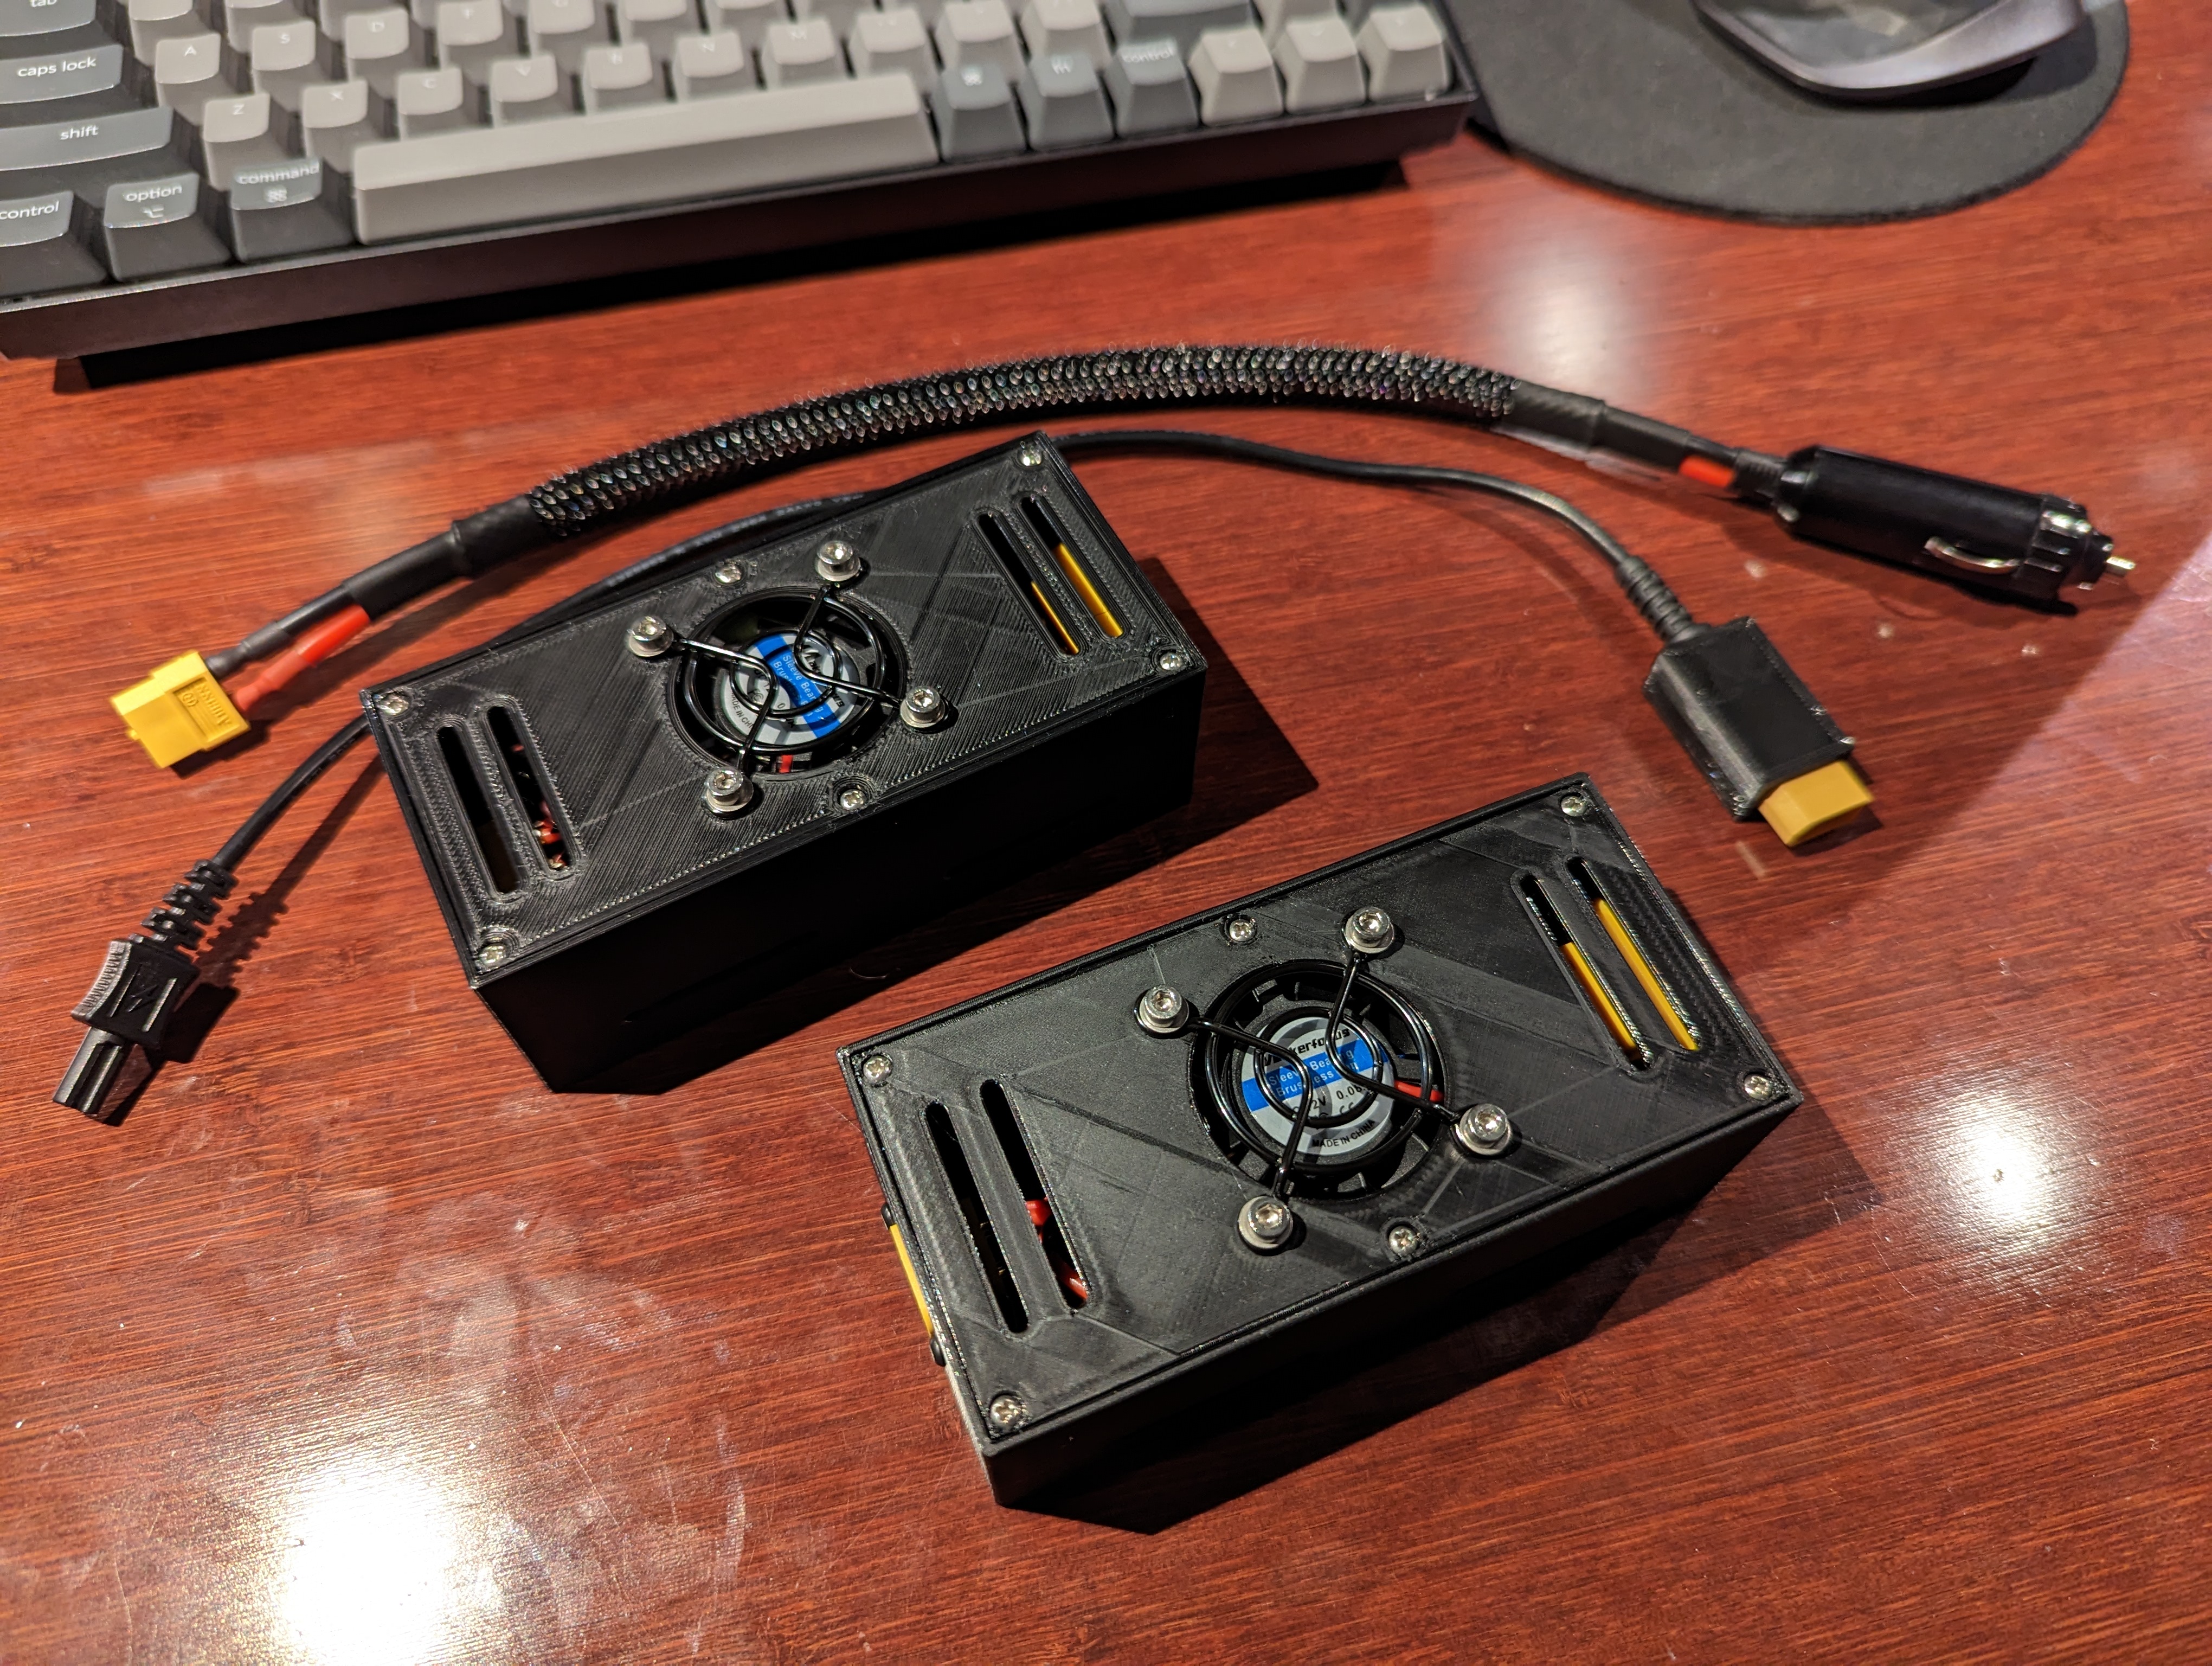
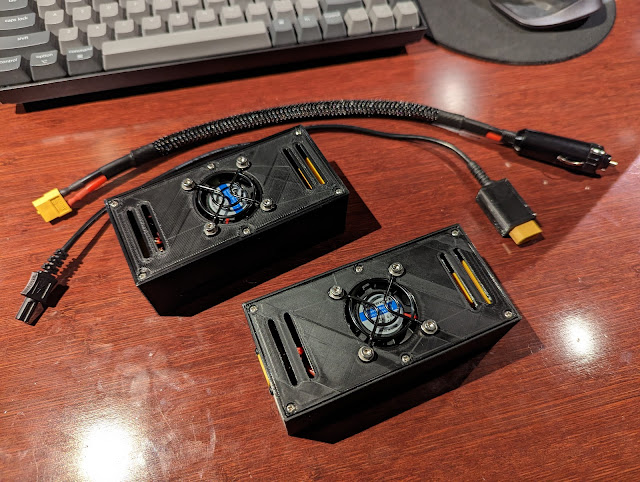
| 12V Compatible Ryobi 40V Battery Charger |
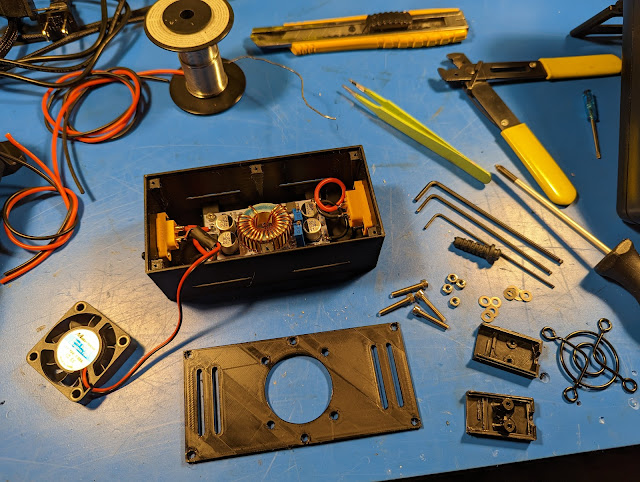
This charger uses an adjustable constant-current/constant-voltage (CC-CV) power supply that steps the 13.8-14.4V that my car provides up to the 42V needed to charge the batteries. I tore apart the OEM chargers that Ryobi provides and found that the weakest link is a blocking diode rated for 3A. The OEM charge adapter ordinarily operates at 1.5A from a wall-powered CC-CV supply. I configured my DC-DC converters to operate at a peak voltage of 42V with 2.75A of current, just shy of the limit of the blocking diode. So far, all has been working well. There is a slight increase in temperature of the case plastics of the charger, but nothing outside of my own personal comfort zone.
![]() |
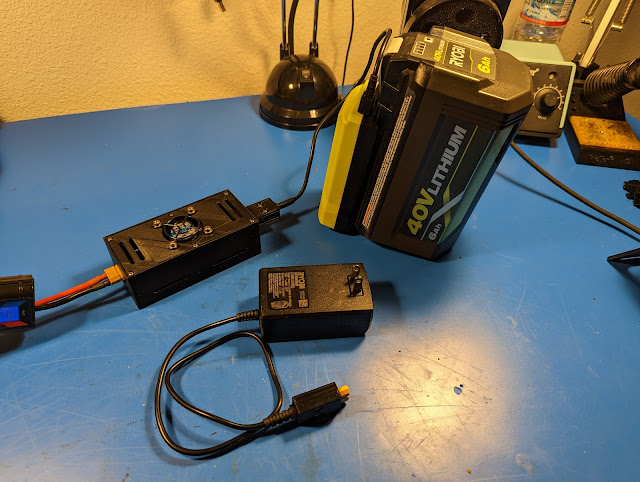
| Ryobi 40V Batteries Charging in the Car :] |
![]() |
| Ryobi 40V Car Charger Assembly |
![]() |
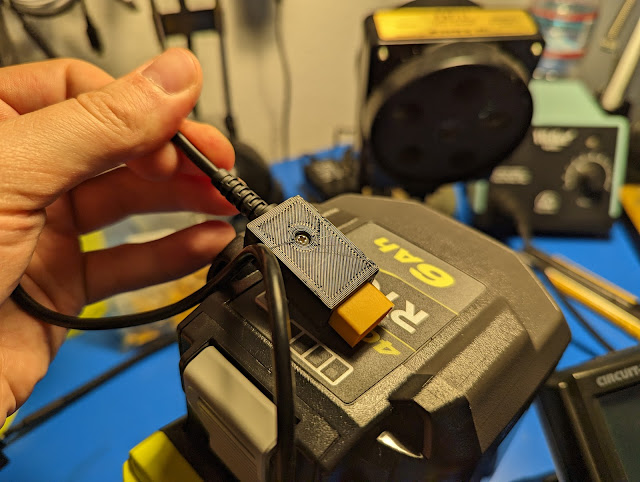
| XT60 Backshell Custom Design |
![]() |
| Finished Assembly |
Sunday, March 14, 2021
QRTape | Audio Playback from Paper Tape with Computer Vision
![]() |
| QRTape |
Monday, November 30, 2020
nrfnet: Streaming Video over nRF24L01
A couple of days ago I published a blog discussing how I used NRF24L01 radios to implement a point-to-point network between two Raspberry Pi computers. I implemented this as a virtual network device and sent packets between the radios.
Since then, I have made numerous improvements to the software and more than tripled the throughput from ~90kbps to nearly 300kbps. These improvements were through a variety of changes that I will cover in this blog post.
![]() |
| Streaming video from one headless Raspberry Pi to another |
Thanks to the higher throughput, I was able to implement streaming video using the h264 HEVC video codec and monaural audio using the Opus codec at 32kbps. The result is great, especially when considering the link.
Continue reading to learn more!
Friday, November 27, 2020
nerfnet: Wireless Networking over nRF24L01 2.4GHz Radios
I recently picked up a set of nRF 2.4GHz radio transceivers. These are low-cost radios with a SPI interface that allow exchanging 32 byte packets across a radio link that can run at up to 2MBit on-air data rates. They are popular among hobbyists who want to introduce wireless to their Arduino-flavored projects. I was able to buy ten of these radios with trace antennas for just $11 and three more with SMA-connected antennas for $18.
![]() |
| NRF24L01 Radios |
My first inclination is to try something a bit more extreme with this hardware. There is a GitHub project named RF24Audio that allows transmitting audio data over these radios. I wondered if video could be possible and started brainstorming about how a video transport over this link would look. The further I got into the specifics of streaming video the more convinced I was that an abstract link that could carry any form of data would be more fun.
This led me to build nerfnet: a simple application that allows sending network frames over NRF24L01 radios. This is implemented by exploiting the TUN/TAP virtual network device API under Linux on a Raspberry Pi. The code is available on GitHub for you to review and use.
I was able to demonstrate nearly 90kBit throughput as measured by iperf. I suspect this is the first time that iperf has been used to characterize a link composed of these radios.
andrew@andrew-pi:~/Projects/nerfnet $ iperf -c 192.168.10.2 ------------------------------------------------------------ Client connecting to 192.168.10.2, TCP port 5001 TCP window size: 43.8 KByte (default) ------------------------------------------------------------ [ 3] local 192.168.10.1 port 34490 connected with 192.168.10.2 port 5001 [ ID] Interval Transfer Bandwidth [ 3] 0.0-10.1 sec 110 KBytes 89.4 Kbits/sec
Continue reading or watch the video to learn more about how I pulled this off.
Friday, September 25, 2020
Plaid Model S Excitement
![]() |
| The Resistor Network Plaid Model S :] |
Tuesday, July 28, 2020
Amateur Radio from 2900ft. on Mount Diablo | 146.520MHz FM Simplex
![]() |
| View from Mount Diablo with Antenna on Trunk |
![]() |
| First QSL Card Design: Lick Observatory |
Tuesday, February 12, 2019
datvideo: Storing Video on Digital Audio Tape (DAT)
![]() |
| Big Buck Bunny from DAT Tape |
I wrote a small tool called datvideo that allows storing arbitrary binary data on the tape. This tool is used to grab raw audio binary data from a sound card, search for frames of binary data, decode them and emit them into another file. This can be assembled into a pipeline to feed video data into a player such as mplayer. How cool is that?
![]() |
| Sony DTC-690, below Marantz Blu-Ray, AV Receiver and New-Old-Stock DAT Tapes |
Tuesday, December 4, 2018
PortL2 - Portable Electric Vehicle Charger
I had originally started with the idea of charging the ELR hybrid pack while driving. The plan was to use a 48V to 390V (96S) lithium battery charger. Accessing the high voltage bus in the car proved to be challenging and made this approach too difficult for my taste. This made me decide build a portable L2 charger using a 240V inverter and an OpenEVSE instead.
| Cadillac ELR Charging at Sierra Trail Head, No L2 Chargers for Miles |
In addition to being a great portable car charger, this has proven to serve well in powerwall applications. I am able to shift on-peak loads to off-peak, thus saving money and reducing reliance on dirty sources of power.
| PortL2 Before Transferring to the Car |
Sunday, February 18, 2018
Groking the Cadillac ELR
Last fall I purchased a Cadillac ELR to keep my Tesla company in the garage. I am a huge fan of this car for the striking good looks and the fact that it is a 2-door coupe. I had also never experienced a PHEV (Plug-In Hybrid Electric Vehicle) and really wanted to try out the GM Voltec platform. The prices of the Cadillac ELR are plummeting due to their relatively short-lived time on the market and the fact that they are a little unknown in the eyes of the average consumer.
![]() |
| Cadillac ELR at Cardinale GMC in Seaside, California |
The Cadillac ELR (and Chevy Volt - they share the same powertrain and a similar UI) tend to shield you from these details. I wanted more and without having to do quick mental math based on the limited information available from the built-in infotainment system.
![]() |
| Speed, Distance, Total Energy and Wh/mi Top | State of Charge (SoC) kWh Left | Speed mph Right |
![]() |
| CAN Bus Interface Cable |
Saturday, September 23, 2017
Crossing the Great Canadian Electric Vehicle Desert
![]() |
| Green: Charging Stops | Red: Rest Stops | Purple: Trip Start/Finish |
![]() |
| Tesla Model S in Rocky National Park, Colorado |
| Driving through the Rockies in Alberta |
This trip encompassed 12000km (7400mi) of driving and consumed more than 2.2MWh of energy spread out over 140+ hours of driving. The trip across from Silicon Valley to Toronto took 8 days, 3 of which were spent navigating Northern Ontario. It was an exercise in patience but the prize of being just one of a few drivers to complete this route in an electric vehicle is unequivocally worth it.
Sunday, January 8, 2017
pwrusbctl: A command-line tool for controlling USB-connected power strips
The company that sells them offer a binary blob driver, but I wanted something that I could extend and modify. I also want it to work with my RaspberryPi.
![]() |
| PowerUSB Basic connected to a RaspberryPi |
[andrew@andrew-rpi-1 pwrusbctl]$ ./pwrusbctl --reset_charge_accumulator --device_info --log_indefinitely --power --energy --interval 2000000 Found PowerUSB device type: Basic Power: 32.200001W Energy: 0.000000kWh Power: 32.200001W Energy: 0.000537kWh Power: 27.599998W Energy: 0.000537kWh Power: 27.599998W Energy: 0.000537kWh Power: 50.599998W Energy: 0.000537kWh Power: 172.500000W Energy: 0.000537kWh Power: 342.700012W Energy: 0.000537kWh Power: 519.799988W Energy: 0.000537kWh Power: 545.099976W Energy: 0.000537kWh
Saturday, December 31, 2016
Extreme Long Range Electric Longboarding: 56km on a Boosted Board
![]() |
| Boosted Board with external battery in my backpack :] |
This battery pack is designed to attach to a custom designed board that I have been working on but is not ready for prime time yet. Below is a sneak preview of the board I am working on. I have decided to name it Voyager as one of the design goals has been to prioritize range.
| 10S6P battery mounted to Voyager with custom charging cable attached |
Sunday, November 6, 2016
ichargermon: a Linux/Mac iCharger monitoring tool
I named the tool ichargermon. Feel free to send a pull request!
The project is written in C/C++ and has no external dependencies at this time. If I decide to support more advanced iChargers I will add libusb as a dependency.
![]() |
| Charging a small 3S1P battery pack |
Anyway, for now here is an example of the output. Thanks for reading!
Input voltage: 15.163V Battery voltage: 40.165V Battery amps: 0.990A Internal temp: 30.300C Cell 0 voltage: 4.009V Cell 1 voltage: 4.010V Cell 2 voltage: 4.012V Cell 3 voltage: 3.998V Cell 4 voltage: 4.014V Cell 5 voltage: 4.014V Cell 6 voltage: 4.014V Cell 7 voltage: 4.014V Cell 8 voltage: 4.017V Cell 9 voltage: 4.019V
Thursday, February 11, 2016
VGA Generation with Freescale i.MX23 + Linux
The first thing I did was modify the device tree (DTS files) to enable the LCD controller and tuned it to generate a VGA signal. I built a simple R/R2 DAC on a breadboard and was able to view the image on an LCD monitor.
| The projected image next to my workstation |
| Hackaday, it doesn't quite like the 640 width |
Tuesday, January 26, 2016
MikMod on STM32F4
![]() |
| MikMod on STM32F4 Hardware :] |
Monday, November 9, 2015
Long Range Electric Longboarding
| My Boosted Board shortly after purchase. |
| My Boosted Board after the battery upgrade :] |
| These LEDs are bright! |
Sunday, November 23, 2014
Flir Lepton Thermal Imaging Sensor + Gameduino 2
| Thermal Andrew :] |
| Front System Overview |
| Rear System Overview and Second Camera (future project ;]) |
Thursday, May 15, 2014
FT800 with Streaming Video
| Connectix QuickCam |
The results were great, aside from the low image quality of the camera. This experiment proves the concept of using an FT800 to composite motion video with other visual elements. A better image sensor would provide a really cool experience.
Keep reading to see how I did it!
Monday, April 21, 2014
2048, Embedded
I decided to pair this board with a Gameduino 2 shield designed for the popular Arduino. I wrote a driver for the FT800 graphics processor and implemented Gabriele Cirulli's 2048 game as a first project with this hardware.
![]() |
| 2048 Screenshot |