
I decided to pair this board with a Gameduino 2 shield designed for the popular Arduino. I wrote a driver for the FT800 graphics processor and implemented Gabriele Cirulli's 2048 game as a first project with this hardware.
 |
| 2048 Screenshot |
 |
| Nucleo F4 Board |
Overview
I wrote a driver for the FT800 graphics processor and used this to implement the popular 2048 game in an embedded environment.
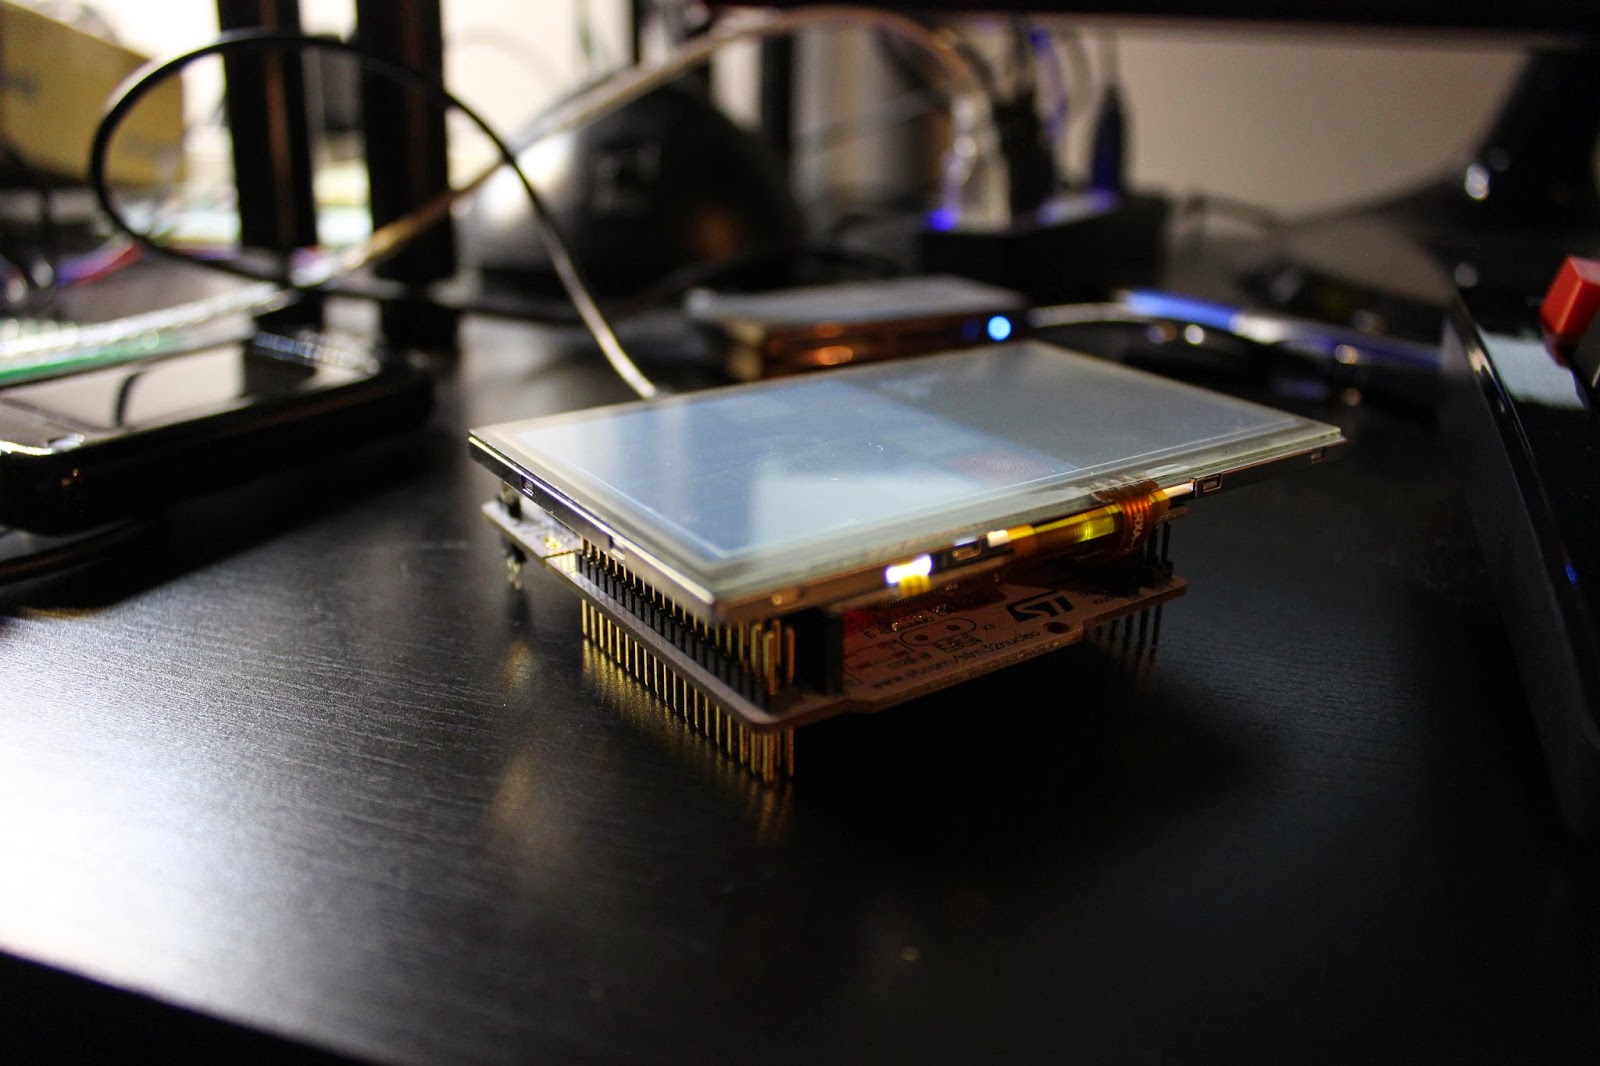 |
| Gameduino 2, Nucleo F4 Board Stackup |
FT800
The FT800 is a fascinating device from FTDI. It is a high performance graphics processor capable of decoding JPEG images, rendering primitives and working with complex transformations. It does a lot of things that were previously impossible with low-cost microcontrollers.
The FT800 also has an interesting programming model. You are expected to treat the device like RAM that you access via SPI messages. The basic messages are really quite simple and consist of write, read and command operations.
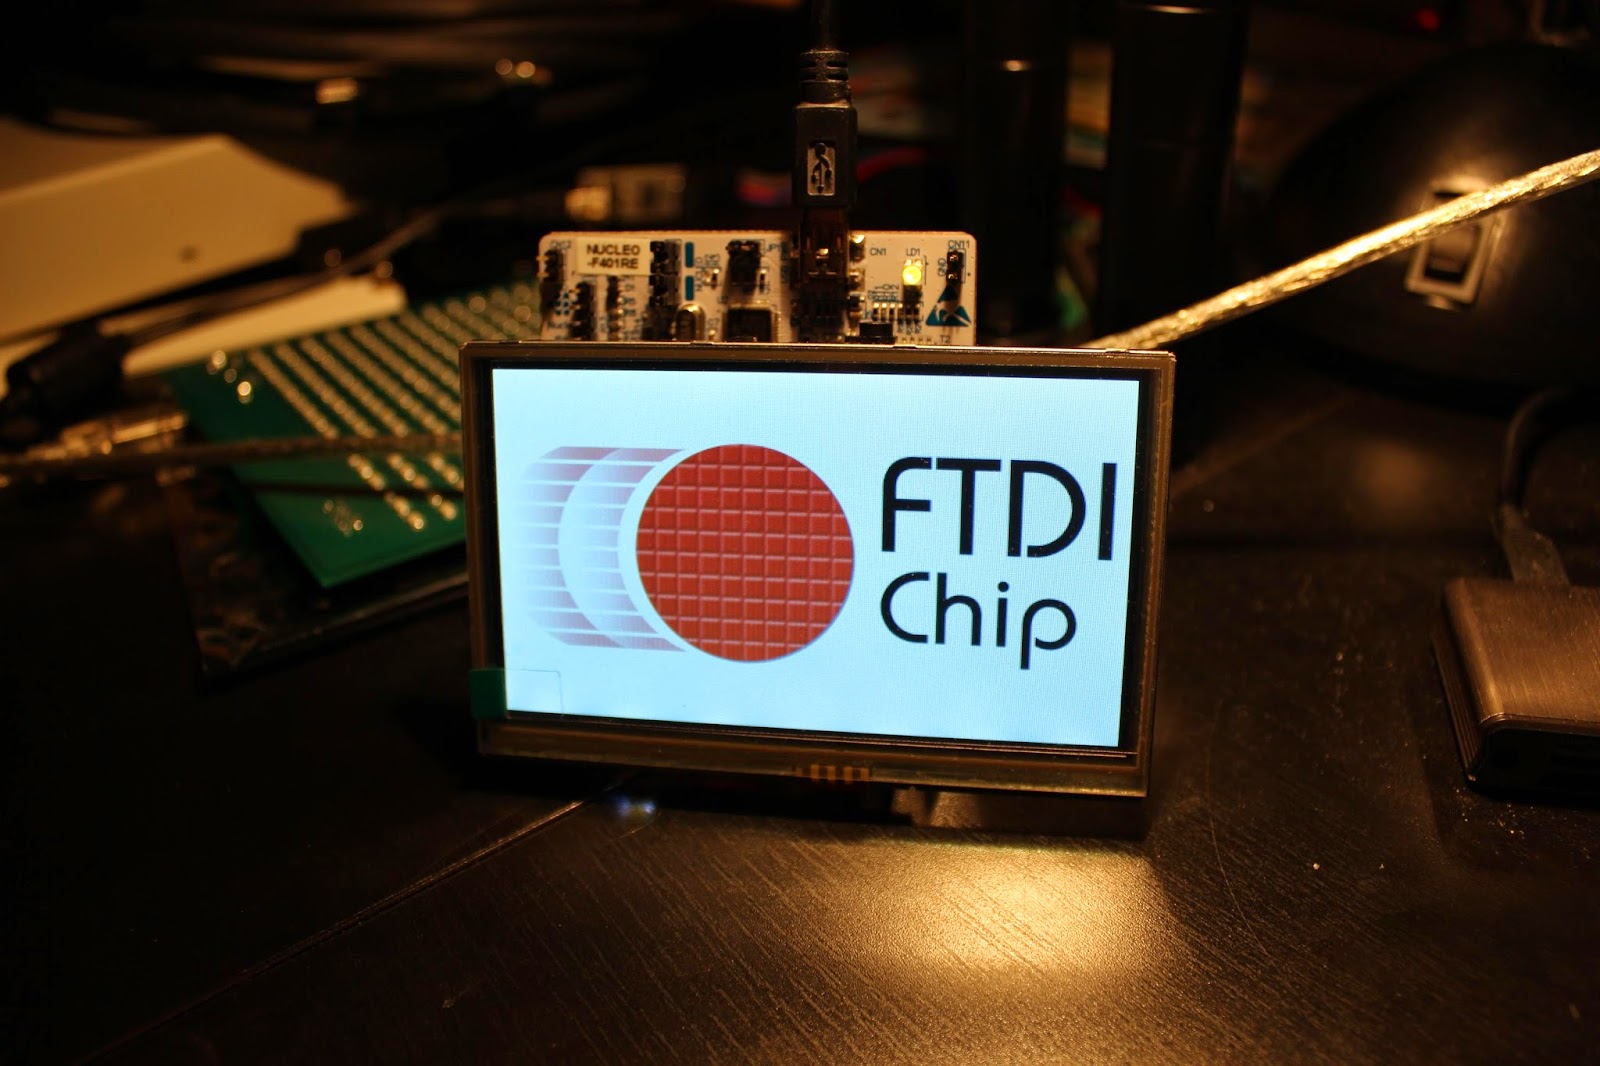 |
| FTDI Built-In Animated Logo |
Command
To send a command, simply send 3 bytes as shown below with the chip select line pulled low for the duration of this transfer.
 |
| Command |
Memory Read
First, you send two zero-bits followed by the 21-bit address. You send a dummy byte to allow the FT800 to prepare the data and then for each 8 clock pulses emitted you will receive one byte starting from the address specified.
 |
| Memory Read |
Memory Write
Last and not least, we need to be able to write to memory. This is yet another simple message that will be sent to the device.
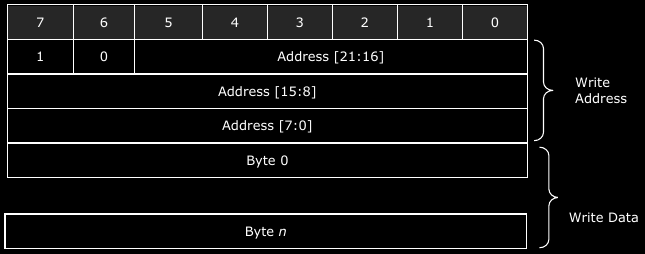 |
| Memory Write |
Memory Map
Having access to a bunch of external memory is nice, but what can we do with it? The FT800 datasheet provides us with a table indicating the various ranges of memory available for reading/writing. We are especially interested in the Command, Display List and Register Memory.
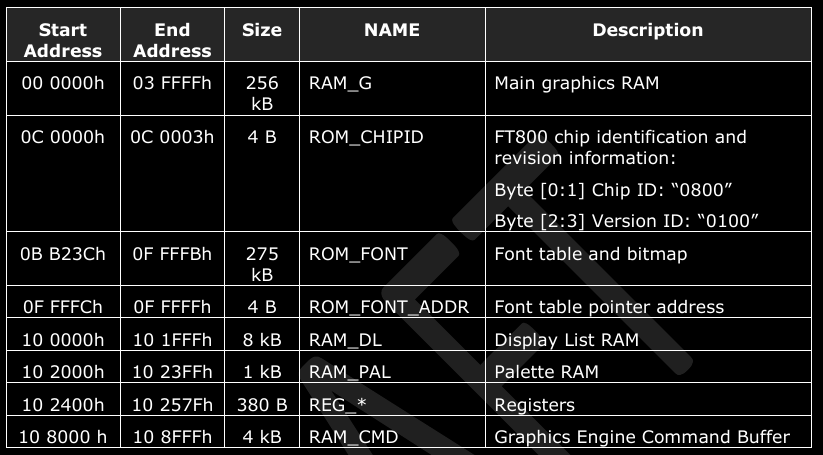 |
| FT800 Memory Map |
By maintaining state variables on the host MCU, it is possible to instruct the FT800 to do very interesting things. Here is the data structure I created to model the FT800.
typedef struct FT800_t {
    volatile SystemSpiModule_t *Spi;
    volatile SystemGpioModule_t *CsPort;
    uint32_t CsPin;
    uint32_t CommandAddress;
} FT800_t;
This structure allows for multiple FT800 devices to be connected to one processor. This could allow for an interesting multi-seat setup hosted by a single microcontroller. One member of this struct is the command address. This allows me to strategically write sequential commands to the RAM_CMD section of memory. The value of this address is managed by the driver I have written.
Driver
I will be perfectly honest. My first go at this device was rocky at best. Most of my experiences with display technologies have been lackluster. There are too many configuration parameters that could be wrong. A good example of this is that the Gameduino uses a different "swizzle" value. Swizzle is a funny term used to describe the sub-pixel ordering (RGB, GRB, BGR etc).
The first thing I did was take a look at the Gameduino 2 source. I found a few hints in there about how to generate a blank screen. I took this sequence of display list instructions and implemented them using my driver. The first step is to set the clear color, clear buffers, end the display list and then flip it onto the screen. I decided to clear to red and ended up with the following. Success, at last!
 |
| Cleared Red Screen :] |
Here are my SPI read/write functions. These sit at the lowest level in my stack.
The code below is used to generate display list instructions for a rectangle primitive. I am especially proud of the way I am packing the bits in the FT800DlVertexI function. I used an anonymous union/struct with a bitfield to avoid all of the nasty bitwise operations. This isn't 100% portable to other compilers/processors but it works great in this particular instance.
Once I had a rectangle function, I was off to the races. I quickly put together a 2048 game board and rendered it. Very exciting times!
void FT800SpiWrite(FT800_t *ft800, uint8_t *buf, uint32_t length)
{
    for(uint32_t i = 0; i < length; i++)
    {
        SystemSpiWriteRead(ft800->Spi, buf[i]);
    }
}

void FT800SpiWriteRead(FT800_t *ft800, uint8_t *buf, uint32_t length)
{
    for(uint32_t i = 0; i < length; i++)
    {
        buf[i] = SystemSpiWriteRead(ft800->Spi, buf[i]);
    }
}
As I worked with the device more I built-up more complex abstractions and eventually decided to create a rectangle function. I was able to render a rectangle quite easily. |
| First Rectangle (with notes of bit-packed messages) |
void FT800DrawRectangle(FT800_t *ft800, FT800Point_t p1, FT800Point_t p2)
{
    FT800DlStartPrimitive(ft800, FT800PrimitiveType_Rectangle);
    FT800DlVertexI(ft800, p1.X, p1.Y, 0, 0);
    FT800DlVertexI(ft800, p2.X - 1, p2.Y - 1, 0, 0);
    FT800DlEndPrimitive(ft800);
}

void FT800DlStartPrimitive(FT800_t *ft800, FT800PrimitiveType_t primitive)
{
    uint8_t startPrimitive[] = { (primitive & 0x0F), 0x00, 0x00, 0x1F };
    FT800CoprocessorCommand(ft800, startPrimitive, 4);
}

void FT800DlVertexI(FT800_t *ft800,
    uint16_t x, uint16_t y, uint8_t handle, uint8_t cell)
{
    union {
        struct {
            uint32_t cell   : 7;
            uint32_t handle : 5;
            uint32_t y      : 9;
            uint32_t x      : 9;
            uint32_t cmd    : 2;
        } arguments;

        uint8_t command[4];
    } vertex;

    vertex.arguments.cell = cell;
    vertex.arguments.handle = handle;
    vertex.arguments.y = y;
    vertex.arguments.x = x;
    vertex.arguments.cmd = 0x02;

    FT800CoprocessorCommand(ft800, vertex.command, 4);
}

void FT800DlEndPrimitive(FT800_t *ft800)
{
    uint8_t endPrimitive[] = { 0x00, 0x00, 0x00, 0x21 };
    FT800CoprocessorCommand(ft800, endPrimitive, 4);
}

void FT800SendCommand(FT800_t *ft800, FT800Command_t command)
{
    uint8_t commandBuf[] = { command, 0x00, 0x00 };
    FT800SpiWriteCs(ft800, commandBuf, 3);
}
Once I had a rectangle function, I was off to the races. I quickly put together a 2048 game board and rendered it. Very exciting times!
 |
| First u2048 Render :] |
Game Logic
Next it was time to implement my version of 2048 that I decided to call u2048. I am modelling the game using the following data structure. It is simply a score variable and a 2D array of game tiles.
typedef struct U2048_t {
    int Score;
    U2048Tile_t Tiles[U2048_GAME_SIZE][U2048_GAME_SIZE];
    FT800_t *ft800;
} U2048_t;
One interesting feat of my implementation is that the game size can be changed readily, which in turn makes it easier. It is currently a #define, but it could easily be made into a game state variable.Random Tiles
The first requirement is the ability to place tiles randomly. When tiles randomly appear in Gabriele's implementation there is a slight chance that the piece will be a 4 rather than a 2. My version always emits 2's but I could likely make a simple change to allow mine to behave more closely to the web implementation.
Below is my method for randomly generating a tile. I am using the stdlib rand function seeded with the frame count register from the FT800 device. You probably don't want to generate your SSH keys from this random number generator but it is good enough for this simple game. I noticed one bug while writing this article. I am masking off the least significant digits in order to restrict the random number to be in the range of 0 to 3 inclusive. This will not handle a change of board size well.
void U2048RandomTile(U2048_t *game)
{
    uint8_t frameCounter[1];
    FT800Read(game->ft800, FT800Register_FRAMES, frameCounter, 1);

    srand(frameCounter[0]);

    int randomX;
    int randomY;

    bool occupied = true;
    while(occupied)
    {
        randomX = rand() & 0x03;
        randomY = rand() & 0x03;

        occupied = (game->Tiles[randomX][randomY] != U2048Tile_Empty);
    }

    U2048NewTile(game, randomX, randomY, U2048Tile_2);
}
Game Actions
There are four basic game interactions: swipe up, down, left and right. I decided that each operation can be broken down into two operations. I will define justification as pushing all tiles as far as they can travel in the swiped direction. I will also define merging as the act of adding adjacent tiles of equal value together in the direction of the action. Each swipe action consists of a justification, merging followed by a final justification. Below is the function I use to execute a game action. I will leave the gritty details of merging and justification to the code available on GitHub.
void U2048Action(U2048_t *game, U2048Action_t action)
{
    bool tilesMoved = false;

    switch(action)
    {
        case U2048Action_SwipeRight:
            tilesMoved = U2048JustifyRight(game);
            tilesMoved |= U2048MergeRight(game);
            tilesMoved |= U2048JustifyRight(game);
            break;
        case U2048Action_SwipeLeft:
            tilesMoved = U2048JustifyLeft(game);
            tilesMoved |= U2048MergeLeft(game);
            tilesMoved |= U2048JustifyLeft(game);
            break;
        case U2048Action_SwipeUp:
            tilesMoved = U2048JustifyUp(game);
            tilesMoved |= U2048MergeUp(game);
            tilesMoved |= U2048JustifyUp(game);
            break;
        case U2048Action_SwipeDown:
            tilesMoved = U2048JustifyDown(game);
            tilesMoved |= U2048MergeDown(game);
            tilesMoved |= U2048JustifyDown(game);
            break;
    }

    if(tilesMoved)
    {
        U2048RandomTile(game);
    }

    U2048GameRender(game);
}
Score is incremented whenever tiles are merged together by the following code.void U2048PlaceNextTile(U2048_t *game, int x, int y)
{
U2048Tile_t newTile = U2048NextTile(game->Tiles[x][y]);
U2048NewTile(game, x, y, newTile);
game->Score += newTile;
}
The 2048 game itself is really quite simple. I would like to revisit my justify and merge functions, I believe they can be simplified. I was able to get this game implemented in the context of a day so there is definitely room for improvement.Below is a video of early tests of the game logic, before I was keeping track of score.
Touch Screen
typedef enum FT800Gesture_t {
    FT800Gesture_None,
    FT800Gesture_SwipeUp,
    FT800Gesture_SwipeDown,
    FT800Gesture_SwipeLeft,
    FT800Gesture_SwipeRight,
    FT800Gesture_Touch
} FT800Gesture_t;

typedef struct FT800Point_t {
    int16_t X;
    int16_t Y;
} FT800Point_t;

typedef struct FT800GestureDetail_t {
    FT800Gesture_t Gesture;
    FT800Point_t Position;
} FT800GestureDetail_t;
I have a function that I can call to determine the users intent. If they are gesturing something, I will receive a non-None gesture and I can take action accordingly. Below is the game loop currently located in main. U2048_t u2048;
U2048Init(&u2048, &ft800);
U2048GameRender(&u2048);
U2048RandomTile(&u2048);
U2048RandomTile(&u2048);
while(1)
{
FT800GestureDetail_t detail;
FT800GetTouchGesture(&ft800, &detail);
switch(detail.Gesture)
{
case FT800Gesture_SwipeUp:
U2048Action(&u2048, U2048Action_SwipeUp);
break;
case FT800Gesture_SwipeDown:
U2048Action(&u2048, U2048Action_SwipeDown);
break;
case FT800Gesture_SwipeLeft:
U2048Action(&u2048, U2048Action_SwipeLeft);
break;
case FT800Gesture_SwipeRight:
U2048Action(&u2048, U2048Action_SwipeRight);
break;
default:
break;
}
}
The numerous layers of abstraction make this code elegant.Game Play (Show me the Money!)
The game is quite fun to play, despite the fact that I have yet to actually beat the game. I do not have any code to handle the "win" situation as of yet. I will have to invest some time into creating a fancy credits screen. Below is a short video demonstration of the game in action!
I went a little overboard with the animations and as such each turn takes considerably longer than the web-based version. The end result is a cool looking UI though and I got to exploit the functionality of the graphics processor.
Conclusion
Feel free to check out the code on GitHub. I am interested in your comments and suggestions so feel free to send them over.
Thanks for reading!
No comments :
Post a Comment
Note: Only a member of this blog may post a comment.